
Sunday, July 10, 2011
Grilled Shrimp with Garlic


Saturday, July 9, 2011
Whole-grain Blueberry Muffins

Last week, I started a summer activity that is fun but educational, called Alphabet Adventure with my 5 and 3 year old. To be honest, I thought the kids would get bored with it after the first couple of letters, but they really got into this game and are excited about starting it up again this week. It's not just entertaining for the kids, but I am really getting into it as well (especially when it involves Donuts on letter D day!). We started with letter A last Monday and do four letters a week (M-Thu). I usually try to plan a fun activity, at least one food, and a coloring page for whatever letter we are doing.
Tuesday, July 5, 2011
Black Bean Veggie-Sushi Wraps

If you are experiencing really HOT weather (100*F and above) like we are right now, you will really appreciate this quick recipe. Plus you don't have to turn on your oven or stove, and heat up your house even more. YEY!
The black bean spread that goes on these wraps is outstanding! I like to double the recipe and have the rest as a dip the next day. These would also be good for lunch, especially since they are not very messy and you don't need any utensils. Happy Summer!
The recipe is adapted from a cookbook called The New Vegan Cookbook by Lorna Sass . If you are interested in purchasing the book, check out the amazon link here.
Wrap Recipe
Serves: 4 Prep: 10 minutes Cooking Time: 0 minutes

1 15oz can (2 cups) of black beans
1 TB toasted sesame oil
1 TB soy sauce
1-2 TB grated fresh ginger
1-2 tsp chili-garlic sauce (optional)
4 sheets of Nori
4 whole-wheat tortillas (8-9 " diameter)
1 cup red cabbage, finely shredded
1/2 red bell pepper, cut into strips
1-2 carrots, cut into sticks
1/2 cucumber, cut into 8 sticks
1. Add black beans through chili-garlic sauce into a food processor, and combine till smooth.
 2. To assemble your wraps, stack 1 sheet of nori on a tortilla and with a pair of kitchen scissors trim the sheets into circles about 1/2" smaller than the tortilla.
3. Spread 2 TB black bean mixture on to tortilla.
 4. Sprinkle 1/4 cup cabbage over bean spread.
 5. Carefully press a nori circle on top.
 6. Spread another 2 TB of black bean mixture on top of nori.
 7. Add veggie strips (2 red bell pepper, 2 carrot, and 2 cucumber) on top of black bean mixture.

8. Wrap the tortilla over the vegetables tightly to make a roll. With the seam side down, carefully cut the roll in half, or cut into 5-6 pieces on the diagonal.
-------------------------
Plan and Prep Ahead
Here are some helpful techniques to make life a little easier once dinner time hits. These tips will especially help those that work full-time and don't have a lot of time to prepare dinner.
~make black bean spread ahead of time and keep in fridge until ready to use.
~Cut up veggies and have on hand in the fridge until ready to use.
-------------------------

1 15oz can (2 cups) of black beans
1 TB toasted sesame oil
1 TB soy sauce
1-2 TB grated fresh ginger
1-2 tsp chili-garlic sauce (optional)
4 sheets of Nori
4 whole-wheat tortillas (8-9 " diameter)
1 cup red cabbage, finely shredded
1/2 red bell pepper, cut into strips
1-2 carrots, cut into sticks
1/2 cucumber, cut into 8 sticks
1. Add black beans through chili-garlic sauce into a food processor, and combine till smooth.

3. Spread 2 TB black bean mixture on to tortilla.


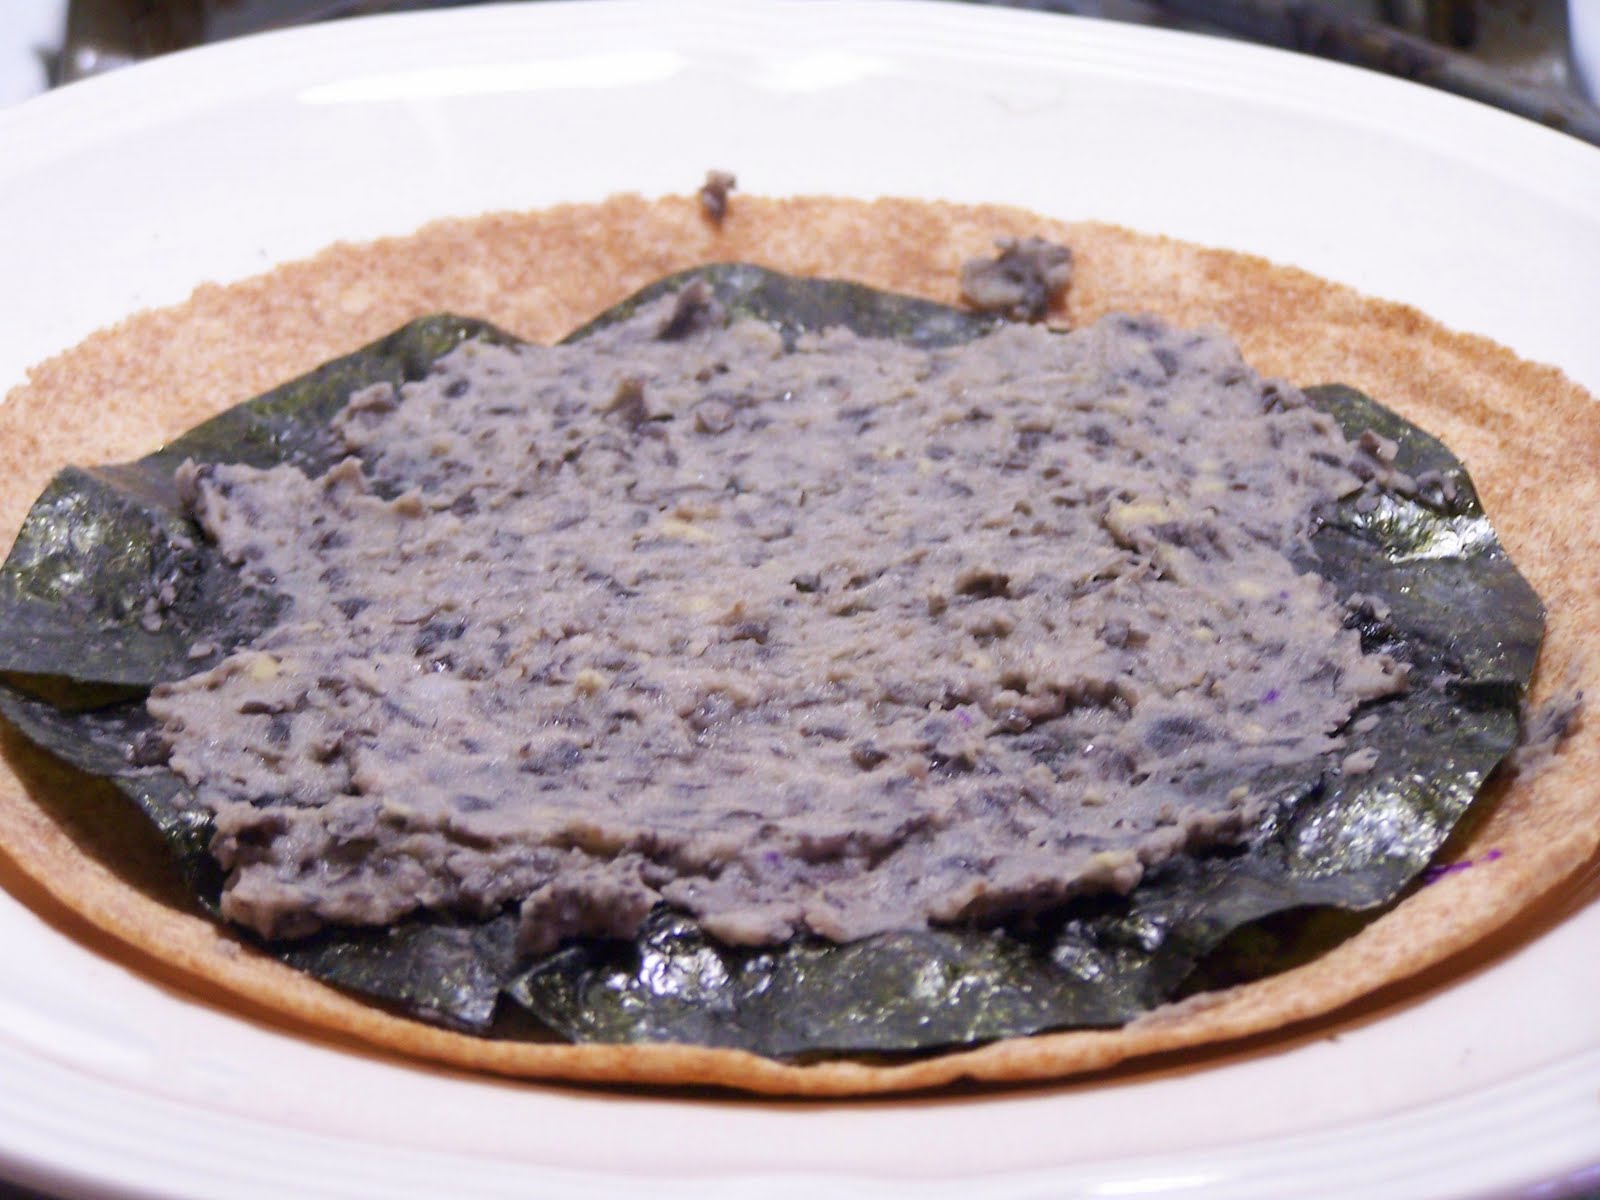

8. Wrap the tortilla over the vegetables tightly to make a roll. With the seam side down, carefully cut the roll in half, or cut into 5-6 pieces on the diagonal.
-------------------------
Plan and Prep Ahead
Here are some helpful techniques to make life a little easier once dinner time hits. These tips will especially help those that work full-time and don't have a lot of time to prepare dinner.
~make black bean spread ahead of time and keep in fridge until ready to use.
~Cut up veggies and have on hand in the fridge until ready to use.
-------------------------
Who likes to CHANGE IT UP?
~Try a black soybean or white bean instead of black beans.
~Chop up some pickled ginger instead of fresh.
~Use chopped spinach, cilantro, parsley, chopped kale or sprouts instead of cabbage.
~Substitute sliced tomato, crisp green beans, sliced avocado or sliced red onion for the vegetables listed.
~Skip the nori all together if you don't care for the taste.
~Try a black soybean or white bean instead of black beans.
~Chop up some pickled ginger instead of fresh.
~Use chopped spinach, cilantro, parsley, chopped kale or sprouts instead of cabbage.
~Substitute sliced tomato, crisp green beans, sliced avocado or sliced red onion for the vegetables listed.
~Skip the nori all together if you don't care for the taste.
-------------------------
Thursday, June 16, 2011
Buttermilk-Black-eyed Peas Salad

I gotta say, it's been a hard switch for me going from cooking heart-warming stews, casseroles and dutch oven chicken to "no turning on the oven NO MATTER WHAT" dishes like salads, wraps and grilled foods. Why is that? I'm really not an expert on the grill yet. I usually leave that for the weekend when my hubby is home and it's kind of his domain. Gotta get in some practice!
This is the perfect side salad for a hot day with summery vegetables like chopped cucumbers and tomatoes, and they add a nice splash of color and flavor to the dish. The buttermilk dressing is outstanding, and can easily be used for a green salad, noodle or quinoa salad. Have fun with this recipe!
The recipe is adapted from Ellie Krieger. You can check out the original recipe here.
Salad Recipe
Serves: 6 Prep: 15 minutes Cooking Time: 0 minutes


3/4 cups buttermilk
3 TB mayonnaise
1 1/2 tsp honey-mustard or spicy brown mustard
1 1/4 cup apple cider vinegar
1/8 tsp hot pepper sauce
1/2 tsp salt
1/8 tsp black pepper
3 TB mayonnaise
1 1/2 tsp honey-mustard or spicy brown mustard
1 1/4 cup apple cider vinegar
1/8 tsp hot pepper sauce
1/2 tsp salt
1/8 tsp black pepper
3 cups cooked black-eyed peas (or 2 15.5oz cans rinsed and drained)
1/2 cup red onion, diced
1/2 cucumber, diced
1/2 cup red onion, diced
1/2 cucumber, diced
3/4 cup cherry tomatoes, quartered or halved
4 cups spinach leaves, lightly packed and cut into wide ribbons
2 TB chives, chopped (optional)
1. Whisk together the buttermilk through pepper in a small bowl.
2. In a large bowl, combine black eyed peas through chives.
3. Pour dressing in 1/2 cup increments. There might be some dressing left over; you don't want the salad to be too soggy. Incorporate dressing gently, so the beans not get too mushed. Add spinach and toss to coat. Season with salt and pepper and more hot sauce if needed. Serve immediately. This salad will last about 2-3 days in your fridge, but tastes the best the first day.
-------------------------
Plan and Prep Ahead
Here are some helpful techniques to make life a little easier once dinner time hits. These tips will especially help those that work full-time and don't have a lot of time to prepare dinner.
~make buttermilk dressing ahead of time and keep in fridge until ready to use.
~Incorporate beans with cut-up vegetables, and keep in fridge until ready to use.
~Cut up vegetables ahead of time, and keep in fridge until ready to use.
-------------------------
Who likes to CHANGE IT UP?
~You can use a different bean like white beans or kidney instead of black-eyed peas.
~Add some cranberries for a different flavor.
~Try 1/2 tsp dill in the buttermilk dressing.
~Use different vegetables like celery, bell pepper or green onions.
~Instead of spinach use a mixed green salad.
~You can use a different bean like white beans or kidney instead of black-eyed peas.
~Add some cranberries for a different flavor.
~Try 1/2 tsp dill in the buttermilk dressing.
~Use different vegetables like celery, bell pepper or green onions.
~Instead of spinach use a mixed green salad.
-------------------------
Tuesday, June 7, 2011
Chocolate-Cranberry Power Bars

The recipe is adapted from the 101Cookbooks Blog. You can check out Heidi's original recipe here.
Bars Recipe
Serves: 24 Bars Prep: 15 minutes Cooking Time: 7 minutes
1 cup walnuts, chopped
1 cup slivered almonds
2/3 cup (unsweetened) shredded coconut
1 1/4 cups rolled oats
1 1/2 cups Rice Crispies
1 cup brown rice syrup
1/4 cup agave syrup
1/2 teaspoon fine-grain sea salt
2 tablespoons cocoa powder
1 teaspoon pure vanilla extract
3/4 cup cranberries
Cooking Spray
1.Lay out walnuts, almonds, coconut, and oats on baking sheet. Bake at 350*F for 7 minutes.
 2. Meantime, add Rice Crispies to a large bowl.
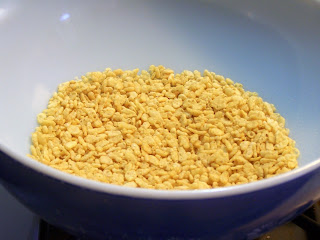 3. Once oat mixture has toasted in the oven, add to Rice Crispies.
 4. Add cranberries to oat mixture.
 5. Add brown rice syrup through vanilla extract to a small saucepan over medium heat. Bring mixture to a boil, constantly stirring for 4 minutes.
 6. Add chocolate sauce to oat mixture and stir well together.
 7. Spray a 9x13 pan with cooking spray. Add mixture to pan, and flatten with the back of a measuring cup.
 8. Let cool to room temperature for about 1 hour or stick it in the fridge for about 30 minutes to harden. Flip pan over on top of a cutting board or use a metal spatula to cut into squares while still in pan. Cut into 24 squares. Refrigerate indivudal squares wrapped in plastic wrap or parchment paper.
-------------------------
Plan and Prep Ahead
Here are some helpful techniques to make life a little easier once dinner time hits. These tips will especially help those that work full-time and don't have a lot of time to prepare dinner.
~make oat mixture ahead of time
-------------------------
1 cup walnuts, chopped
1 cup slivered almonds
2/3 cup (unsweetened) shredded coconut
1 1/4 cups rolled oats
1 1/2 cups Rice Crispies
1 cup brown rice syrup
1/4 cup agave syrup
1/2 teaspoon fine-grain sea salt
2 tablespoons cocoa powder
1 teaspoon pure vanilla extract
3/4 cup cranberries
Cooking Spray
1.Lay out walnuts, almonds, coconut, and oats on baking sheet. Bake at 350*F for 7 minutes.


-------------------------
Plan and Prep Ahead
Here are some helpful techniques to make life a little easier once dinner time hits. These tips will especially help those that work full-time and don't have a lot of time to prepare dinner.
~make oat mixture ahead of time
-------------------------
Who likes to CHANGE IT UP?
~Try adding flaxseed powder instead of coconut.
~Add raisins, dried cherries, dried apricots instead of dried cranberries.
~Replace espresso powder instead of cocoa powder for a different twist.
~Use pecans, pistachios, or chopped hazlenuts instead of walnuts.
~Substitute cane sugar with agave syrup.
~Try adding flaxseed powder instead of coconut.
~Add raisins, dried cherries, dried apricots instead of dried cranberries.
~Replace espresso powder instead of cocoa powder for a different twist.
~Use pecans, pistachios, or chopped hazlenuts instead of walnuts.
~Substitute cane sugar with agave syrup.
-------------------------
What is brown rice syrup?

Brown rice syrup is "derived by culturing cooked rice with enzymes (usually from dried barley sprouts) to break down the startches, then straining off the liquid and reducing it by cooking until the desired consistency is reached." ~Wikipedia You can find brown rice syrup at any natural food store or in some grocery stores in their natural food section. It's definitely not overly sweet like honey and has a much milder flavor. It does have a sticky texture that is similar to honey though, so you can swap it out easily in recipes.
What is brown rice syrup?
Brown rice syrup is "derived by culturing cooked rice with enzymes (usually from dried barley sprouts) to break down the startches, then straining off the liquid and reducing it by cooking until the desired consistency is reached." ~Wikipedia You can find brown rice syrup at any natural food store or in some grocery stores in their natural food section. It's definitely not overly sweet like honey and has a much milder flavor. It does have a sticky texture that is similar to honey though, so you can swap it out easily in recipes.
Subscribe to:
Posts (Atom)
LinkWithin
